Hexagon provides a zoom-enabled optical 3D scanner for inspecting complex parts
By OEM Update Editorial March 8, 2024 12:38 pm IST
Simpler and more flexible 3D part inspection workflows delivered by the software-adjustable variable resolution functionality of the new SmartScan VR800 structured light scanner.
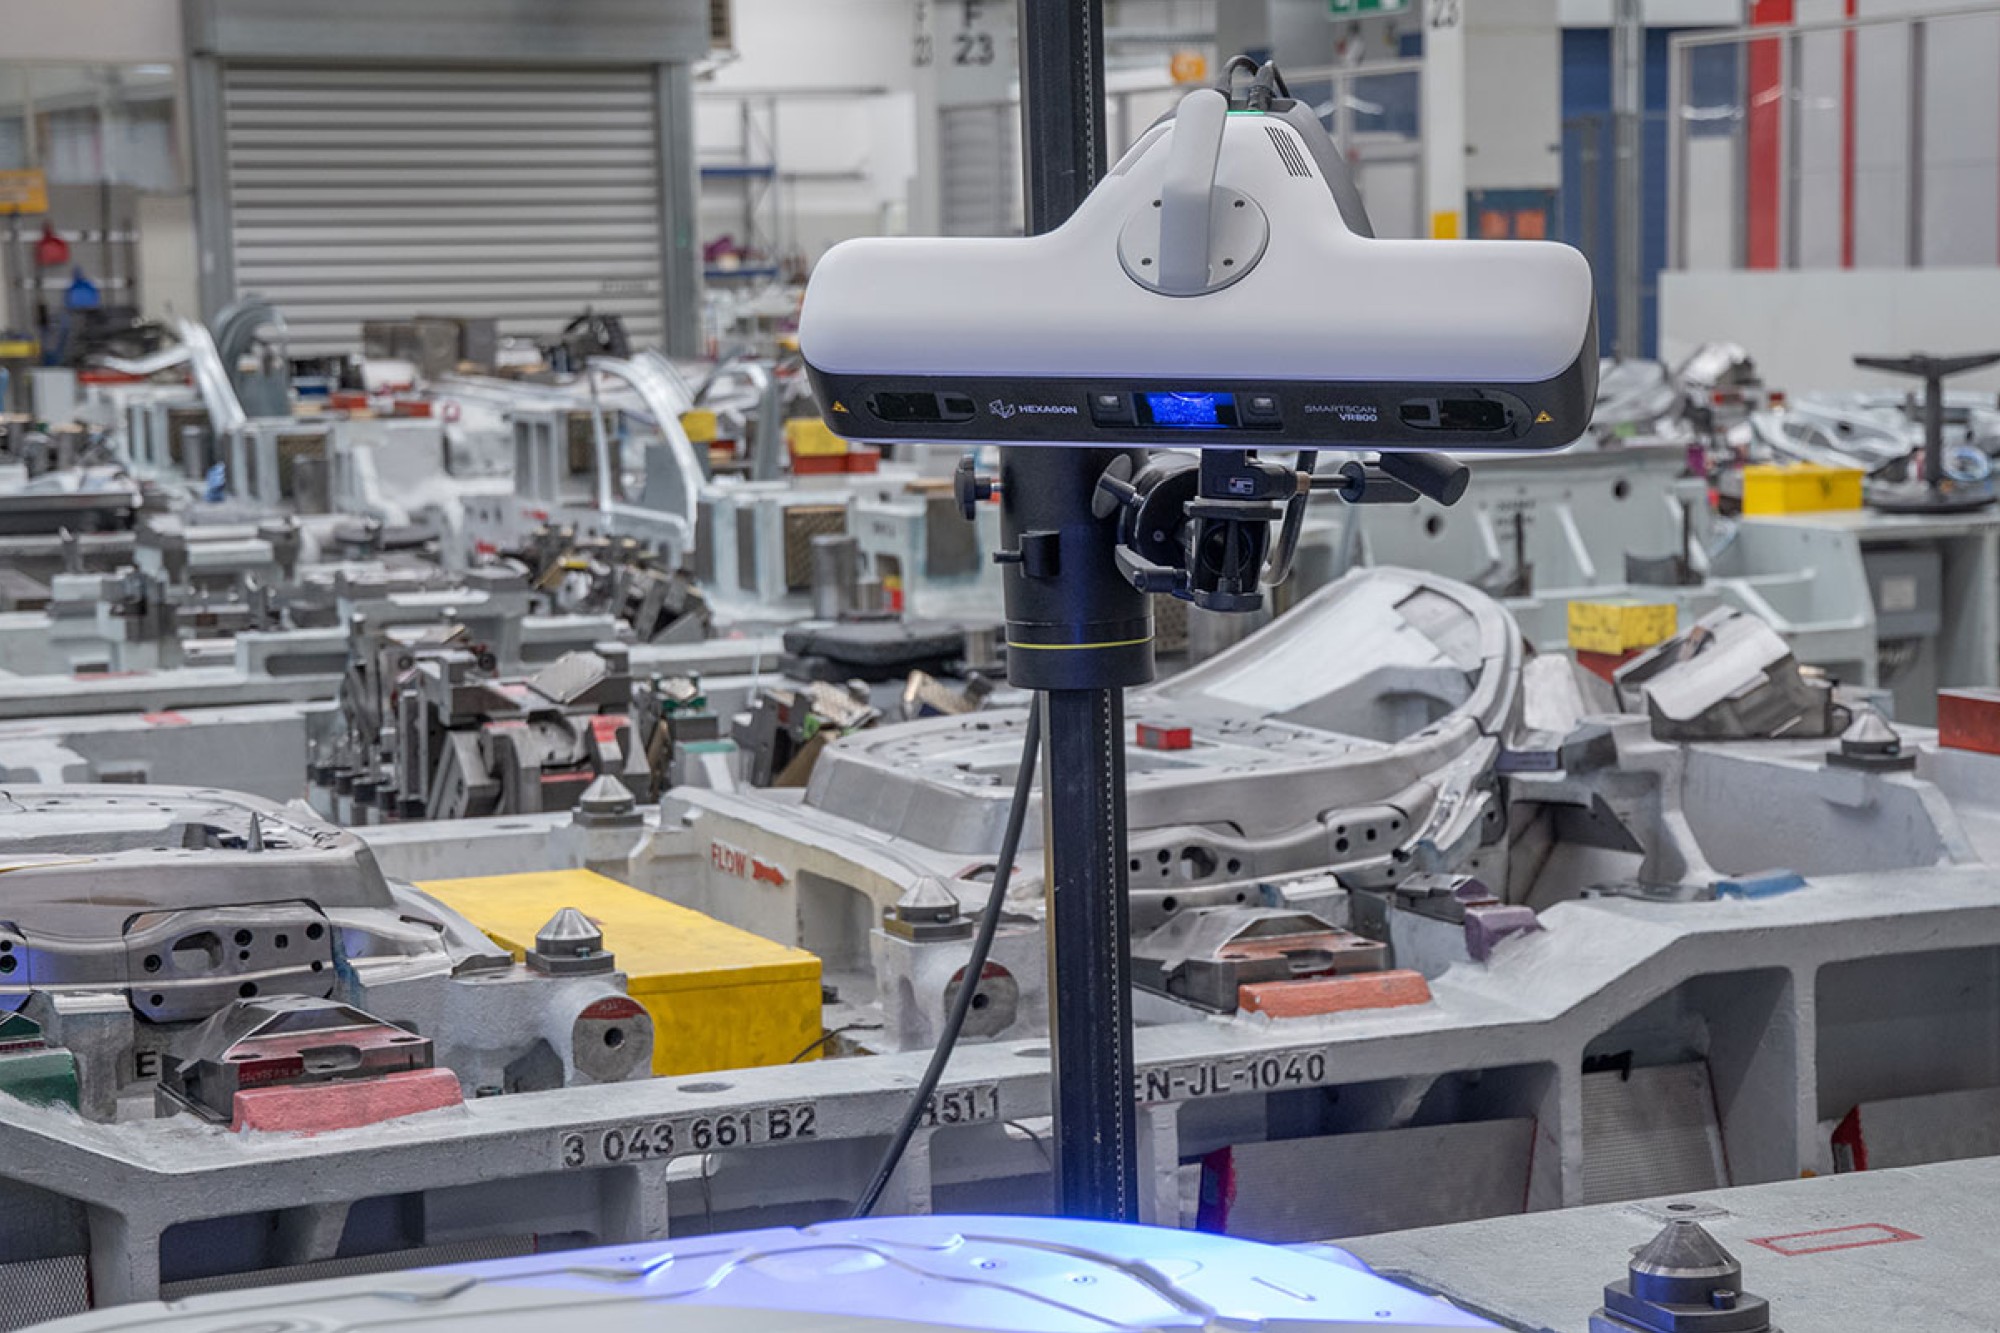
Hexagon’s Manufacturing Intelligence division launched a new type of high-productivity structured light scanner. Built on a completely reengineered platform, the SmartScan VR800 is the first optical 3D scanner on the market with a motorised zoom lens that enables users to adjust data resolution and measurement volume entirely through software settings. This greatly improves the productivity of quality inspection, and further improves workflows with more efficient post-scanning alignment processes, including the ability to combine scans of different resolutions within a single project.
Whereas conventional structured light scanners have a fixed optical configuration, the combination of dual stereo cameras and optical zoom-enabled projection makes the SmartScan VR800 far more flexible, allowing users to define in exactly which form they collect their data. Three new software functions – Smart Resolution, Smart Zoom and Smart Snap – allow the user to customise inspection resolution and measurement volume with no mechanical alterations to the system. That means data-heavy high-resolution scans can be focused on the feature-rich areas that matter most, while other areas can be covered more efficiently by larger and/or lower resolution scans.
The new system streamlines the scanning process from beginning to end, allowing for easy adjustment of scan detail and size through software without requiring manual changes. It enables the combination of detailed and broad scans into a single model, resulting in faster outcomes. Additionally, the system accelerates scan processing by reducing excess data while retaining the necessary detail.
Pirmin Bitzi, General Manager for Portable Metrology Devices at Hexagon explains, “The need to change optics for different use cases has always been a key challenge when implementing structured light scanning inspection solutions. Finding a solution to that industry-wide problem was a key motivator for us – we wanted a way to meet the demands of the many applications where it’s not efficient to scan everything at high resolutions, and neither acceptable to scan everything at lower resolutions. That’s what we’ve strived to achieve with the VR800.”
Structured light scanning, otherwise known as white light scanning or simply optical 3D scanning, is a camera-based measurement technology that can deliver extremely high-resolution part data in seconds. Other structured light scanners on the market are stereo-camera systems, with typically two 5-16 MP camera units. The VR800 uses four 20 MP cameras in a dual stereo setup- for a wider range of measurement volumes. This is uniquely combined with an optical-zoom digital projection unit that makes it possible to measure different volumes (three from each camera pair), as well as vary the resolution within each volume. Additionally, the system’s integrated controller unit provides fast pre-processing of scan data on the device, ensuring the data heading into the metrology software is cleaner and easier to use. A custom-built carbon fibre frame ensures thermal stability and allows for longer intervals between calibrations.The VR800’s Smart Snap function in particular delivers significant workflow efficiency, even on parts where everything needs to be scanned at higher resolutions. This mode uses the larger-base camera pair to take an LED flash-supported alignment image at the same time as the smaller-base camera pair performs a full high-resolution 3D scan. Because each scan section is now paired with an alignment image, knitting the scan data together is both easier and more efficient – there’s no more need for overlaps of data-intensive high-resolution scans that require heavy-duty processing power to achieve an aligned mesh.
These new scanning capabilities can be applied to a broad range of measurement applications, with significant advantages for the type of parts commonly produced though additive manufacturing, tool and die, and casting and moulding. Manufacturers that perform turbine blade measurements for instance, will see significant efficiency improvements from a system that can scan leading and trailing edges at very high data resolution and deliver lower-resolution alignment data for the rest of the blade form. Similarly, moulded parts often combine small details that demand high-resolution data within a larger object that doesn’t need such detailed data capture to create an accurate model. The VR800 provides the flexibility to make these measurements in a single continuous workflow, using a single structured light scanner with no need for mechanical adjustment by the user, both saving time and reducing the processing power demanded by the inspection process.
As with other structured light scanners from Hexagon’s range, the VR800 can be paired with a turntable or turn-tilt unit to enable semi-automated measurement workflows. The VR800 is also ready for integration within robot- or cobot-based fully automated inspection systems.
The SmartScan VR800 is now available to order from local Hexagon representatives, and more information is available on the Hexagon website.
Cookie Consent
We use cookies to personalize your experience. By continuing to visit this website you agree to our Terms & Conditions, Privacy Policy and Cookie Policy.


