Making aircraft components using precise API measuring and SFIS measuring cells
By OEM Update Editorial June 26, 2023 12:56 pm IST
For the final assembly of the door frames, Airbus supplier Premium AEROTEC (PAG) required automated, reliable quality assurance to measure components in final production at its Varel site. The components are required for door assembly in various aircraft types.
Project: Produce large components with the highest precision
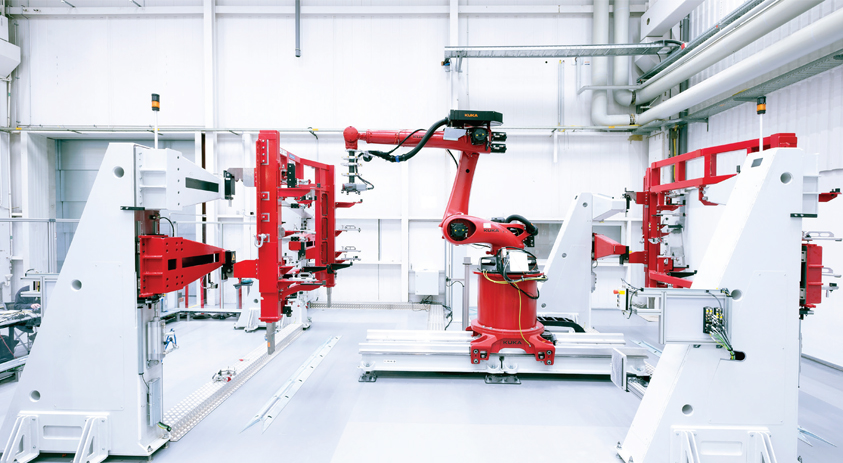
The project aimed to plan and implement a fully automated robot-assisted production line for these components. Due to the precision offered services, Automated Precision Europe GmbH (API) received the order to integrate the measuring cell into the production line of the components. The services included the measuring services, the measuring hardware and the programming for the planned measuring cell.
Premium AEROTEC GmbH (PAG) is one of the world’s leading suppliers (Tier 1) for civil and military aerostructures and an important partner in major European and international aviation programs. Core competencies include developing and manufacturing large and complex-shaped aircraft components made of aluminium, titanium and CFRP.
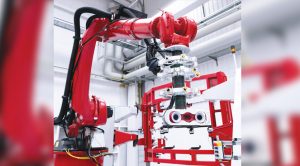
API measuring services and SFIS system
For the production of the door frames, very large components are to be measured fully, automatically and robotically. The specifications required no more than 6 seconds per measuring point, and the measuring accuracy should be between + / – 0.15 mm. The respective measuring volume is approx. 4m x 3m x 2m. Required was the hardware, including the service, integration of the automation of the measuring side, i.e. creating measuring programs, communication with PLC and PLA and the adjustment and calibration of the assembly fixtures – all from one source. The robots of the production line have also been set up with the support of API.The real-time capable, innovative SFIS system combined proven measurement technology with powerful calibration components within one system and was the appropriate solution for this task from PAG.
The API team built the system consisting of an API Radian Pro Laser Tracker and the precise API RapidScan infrared scanner. It was then customised according to the task through specific program developments. The Radian Pro Laser Tracker references the RapidScan, mounted on a robotic arm, and the position of the manufacturing robot in real-time, providing the required accuracy. To inspect the large parts, the robot was mounted on a seventh traversing axis.
Due to API’s reliable hardware and the programming carried out by the measurement experts during installation, the extremely tight requirements were met. The production line reliably measures the door frames in less than 6 seconds per measuring point with an accuracy of + / – 0.15 mm. The measuring volume of these components is up to 4m x 3m x 2m. To prepare the installation, the API team calibrated all assembly fixtures, the assembly line, the measuring cell, the buffer stations and the pre-assembly. The optical stereo image capture of RapidScan’s 3.2-megapixel hybrid sensor captures the components and generates an ultra-high-density 3D point cloud. The customised evaluation software extracts geometries and creates surface topologies that allow direct comparison with the CAD model.
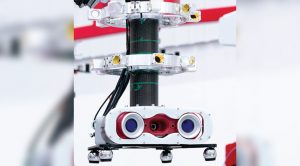
Results
The SFIS system works under all lighting conditions and does not require targets or photogrammetry. The generated point cloud with high density allows it to capture even small areas and assemblies. The modular measurement range is up to 25 m, and setup times are extremely short, making it efficient for PAG. Further developments, reduction of cycle times and thus a higher number of pieces are possible if the production capacity requires it. To maintain the performance and accuracy of the production line, API regularly checks and maintains the measuring equipment used. The plant continues to run during these times due to the available API loaner equipment. The project partners involved are pleased with the excellent production results of the automation project with a challenging task.
Cookie Consent
We use cookies to personalize your experience. By continuing to visit this website you agree to our Terms & Conditions, Privacy Policy and Cookie Policy.


